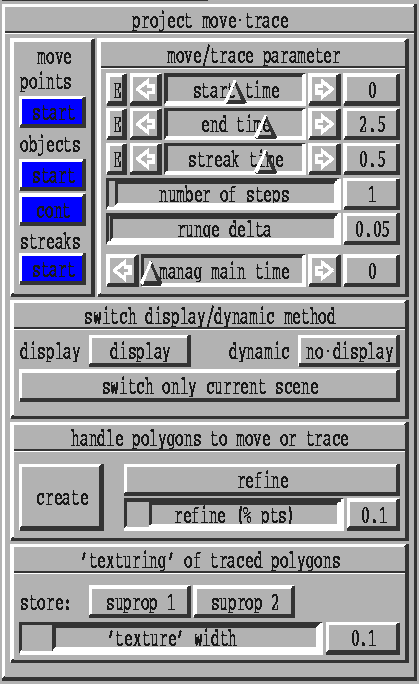
Figure 8.2: The layout of the project move-trace
After adding the project move-trace several buttons and rulers to handle the moving and tracing are provided in the options menu opt1.

Figure 8.2: The layout of the project move-trace
To start or continue one of the the moving methods for points, objects or streaks on the current scene (with a vector valued Fe2d or Fe3d object) press one of the buttons start or cont. A detailed description of these methods can be found in chapter 7.2.2. To move objects it is neccesary that a test set (a surface (Triang2d) or curve (Triang1d)) is located at the position of the next scene.
With create in the handle polygons layer a polygon can be generated by picking the points on a clipping plane. Refine in the same layer on an polygon refines it by dividing each interval in half (adding a new point). The parameter refine (% pts.) adjustes the maximal number of new points in each moving step (number of steps). Be careful with large values in combination with large number of steps because of the the cost of memory. Another possibility to get an object to be moved is to read it from disk using read gr in the manager menu.
The bf move/trace paramter can be adjusted by using the ruler start time, end time, streak time, runge delta, and number of steps. There the two time rulers are multiple used:
The other three rulers are only used to determine the moving parameters described in chapter 7.2.2, too.
The buttons in the switch display/dynamic layer alter the display- rather the dynamic-display-method of the moving objects. The display button shifts the display method of all timescenes stringed together between display and NULL round. The dynamic button shifts the dynamic display method of all timescenes stringed together between NULL, display and tracing round. The method tracing on timestep (with Triang1d objects) has an ability which uses the two texture rulers and the two suprop buttons additional to the time rulers. With the buttons store suprop 1 and store suprop 2 two different surface properties can be stored like the button suprop in the manager menu does. The two surface properties are used to display the rendered moving curve (see Tracing methods in chapter 7.2.3) as a surface consisting of ribbons with these surfaces properties. The width of these ribbons can be modified by varying the ruler 'texture' width.
Copyright © by the Sonderforschungsbereich 256 at the Institut für Angewandte Mathematik, Universität Bonn.